Follow Me On Facebook

Friday 28 June 2013

A Smorgasbord of Crafty Stuff

This card has a lot going on. I myself kinda lost track by the time I completed it (ha ha, kidding). This is like the lasagna of crafts - full of layers and toppings.


Here's what I used:
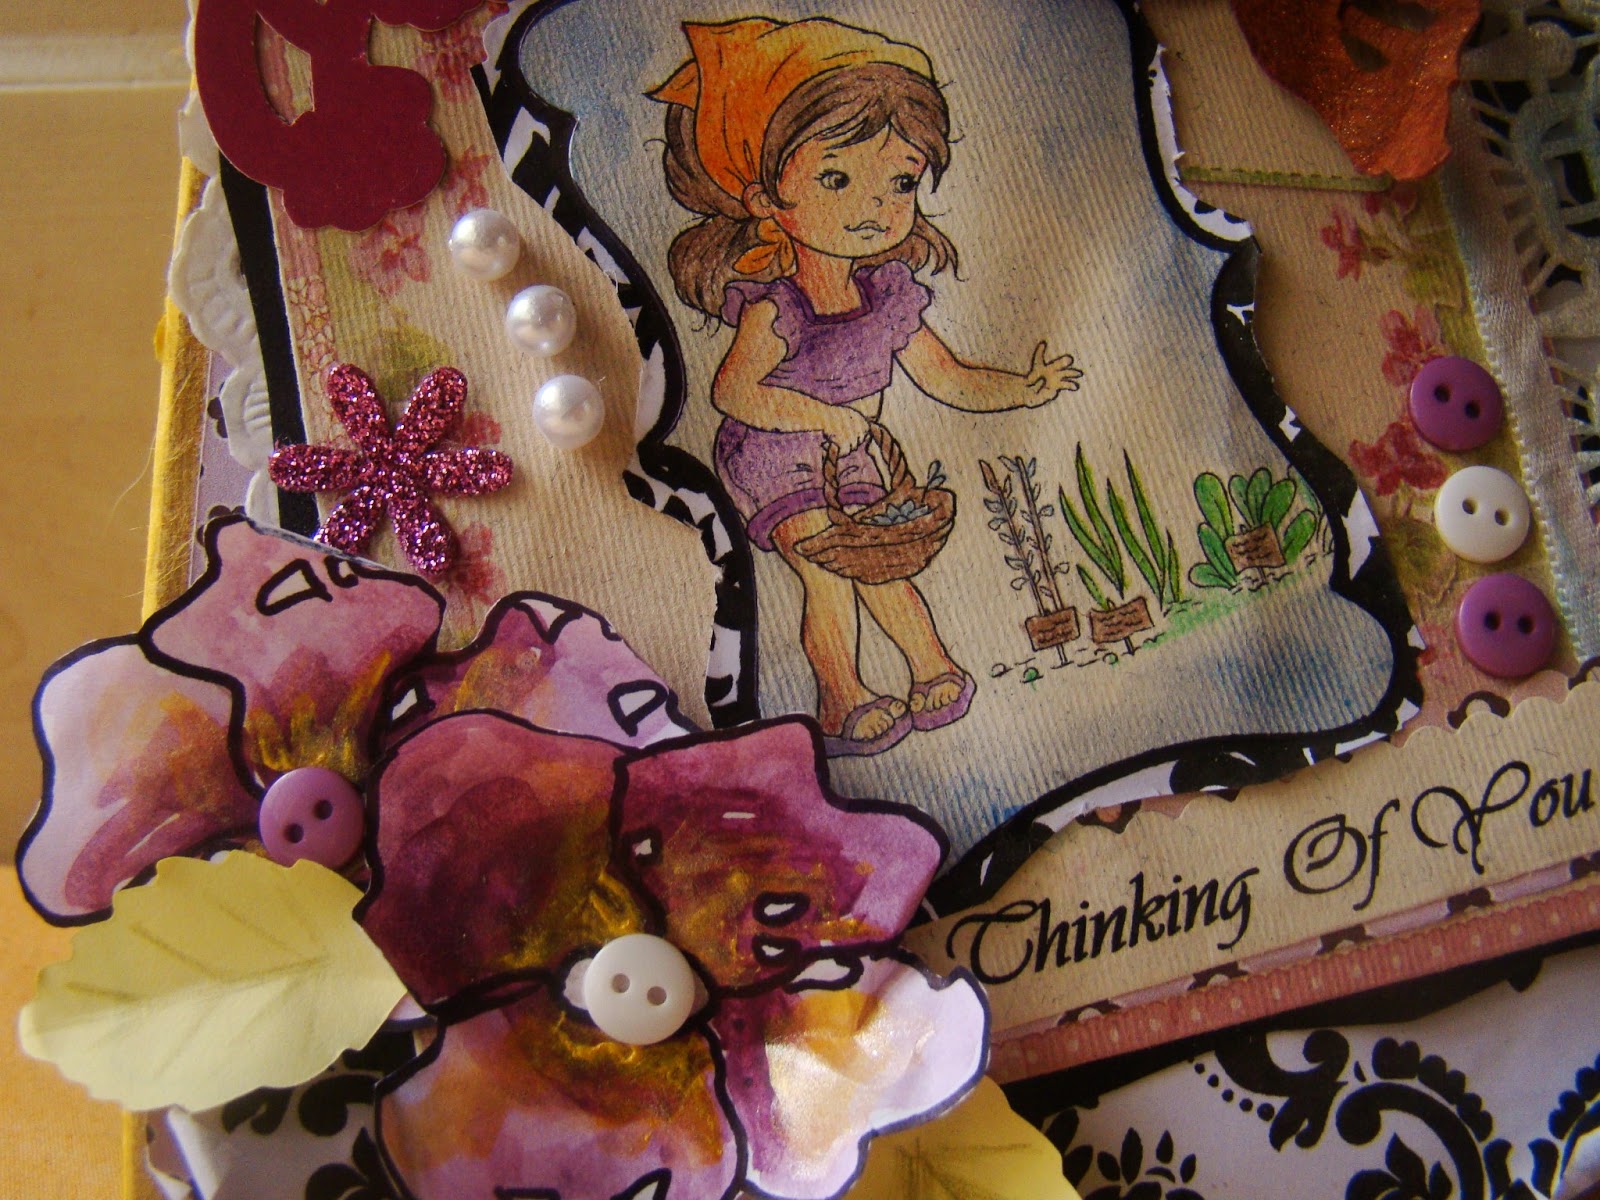
2 digital papers from Shery K Designs and one from The Paper Shelter.
The digi is also from The Paper Shelter.
Used some die cuts for the purple corner and the leaves.
I had the piece of lace in my stash.
Some pearls, stones and buttons for embellishments.
The flowers in the lower left corner have been hand-painted by me.


With this card I will be participating in the following challenges:

Crafting with Dragonflies; Challenge#5 (Card Challenge- Vintage with layers and lace)
Sentimental Sundays; Challenge#160: For the Girls
Eclectic Ellapu; Recipe Challenge
Heck of a Challenge; Play Bingo (lace/die cuts/buttons)
Sparkles Monthly Challenge; Steampunk or Vintage
Country View Crafts Challenge; Die Cuts
Pile it On; Challenge#25 Vintage or Shabby Chic

Take care till next time,
Indrani

Nocturnal Creations

It is becoming increasingly difficult to work in presence of my 7 month old. He is in that experimental phase of his infant-years where he's grabbing everything he could and placing them straight into the mouth. Wow! Quite a difficult situation for a crafter who has her embellishments all over while working. And dangerous too. So these days I am primarily nocturnal, sticking to all my crafty work at night only after my baby is asleep.

I have been meaning to play along the current challenge at Beyond Grey Challenges for a long time now. The challenge involves creating an argyle in your project which I found very interesting - so I came up with this card last night.


Some newly acquired water colour pencils were put to good use to create the argyle background. Thereafter some die cut layer and then some quilling completed the card. And lastly have sprinkled three random diamonds with silver glitter. Here are some more close ups:


Hope you enjoyed the creation. This one will be participating in the challenge#33 at Beyond Grey Challenges.

Indrani

Wednesday 26 June 2013

Quilled Elegance

Quilling flowers of various types is something I enjoy a lot. In fact I love flowers of any kind - quilled, or paper, fresh or dry, anything. Flowers just make me happy. And so many like me would agree. What is it in flowers that make them so endearing? Is is their colours or shapes or the fragrance? Not sure, but I am glad flowers exists on earth or God created flower (the statement changes depending on one's philosophical bent of mind). They bring out the craftiness in me. They really are a crafter's inspiration.

Last night I crafted this quilled card with oranges as the colour scheme. I used a bit of pearl and some beads as embellishments. The beads are from an old bracelet that I had long given up wearing (upcycled item) Most quilled cards I see are mostly devoid of any embellishments. However, I like to be opulent  with embellishments even if I am making a quilled card. Its interesting to experiment a combination of the various card making techniques with quilling.


The flowers are pretty simple. I have pinched them with some swirls.The colour scheme is inspired by the latest challenge at Dynamic Duos. I loved the way it turned out. I could totally use this card as a wedding invitation!


I will be playing along the following challenges with the card:

Dynamic Duos#58-Monochromatic Deep Oranges
LESSology Challenge#26: Feel the Bead!

Take Care,
Indrani

Tuesday 25 June 2013

Just Saying Hello

With today's card I have tried another way of weaving quilling strips to create a mesh effect.


I first embossed a white card stock and then die cut an oval from the centre. Thereafter used two toned strips to weave the mesh. Then covered the back of the mesh with another oval die cut to give it a background. To highlight the emboss, have sponged some pearl acrylic (sky blue and white) paint on the two diagonal corners. I am in love with these pearl acrylics from Camel Fabrica and extensively use them in my works.


The digi in the card is from Sliekje's Digi Stamps. The site has some cute animal digis. The three big yellow flowers in the upper right corner are handmade while the smaller ones are punched. Signed off white a "Hello" sentiment.

With this card I will be playing along the following challenges:

Ciao
Indrani

Sunday 23 June 2013

Inter-weaved Quilling Strips

The idea of inter-weaving quilling strips struck me when I watched this video from Christina Griffith's cardmakingmagic.com. Her video tutorials on various card projects are truly awesome and one of the most-watched by me.When in this video I watched Christina weave ribbons to get the look, I thought of replacing the ribbons with quilling strips for my version. I have used 7 mm quilling strips for this card.

The digi is from The Paper Shelter, one of my most loved digital stamp websites.


With this card, I 'll be playing along the following challenges:

Freshly Made Sketches 91
Pin and Tack "Spark Your Creativity Now" Challenge


Indrani

A Sketchy Card

It was time to try something new - so I crafted a new kind of flower from quilling paper strips and created a simple card in line with the current sketch at CAS(E) this Sketch Challenge shown below.


I am super excited to participate in the very first sketch challenge. The aim was to create a CAS (clear and simple) card. Here's my interpretation of the sketch:


Here's a few more angles. With this card I'll also be playing along Pin and Tack "Spark Your Creativity Now" Challenge.


Hope you enjoyed the card. Have a great day!
Indrani

Saturday 22 June 2013

Some More Glitter

So I thought of combining some quilling work with a dash of glitter. It turns out that a little bit of bling can work wonders.


In this card used a pink, brown and cream colour scheme overall and also for the quilled flowers. Did some die cut leaves in pink and printed paper for the background to the flowers and embossed a strip of paper to give the look of a lace. Lastly added some glittered centres to the smaller flowers. As a contrast to my previous glitter card, I kept the glitter to a minimum. 


I loved the result. Hope you’d like it too. 
This would be my second entry for the Itsy Bitsy "All That Glitters" Challenge and my first entry for the Pin and Tack "Spark Your Creativity Now!" Challenge.

Indrani

Thursday 20 June 2013

Glitter Glamour

This is my first non-quilled card project to be shared here. This card was inspired by the Itsy Bitsy "All That Glitters' Challenge. Once again I am not a big fan of glitters. But trying to work with something you are not particularly fond of - that's what ups the ante. I added a lot of pink - I am a total pink person. Ì had the image from Freekidscoloringandcrafts. I love the images there. I coloured the image with wet glitters. Embossed and glittered a pink strip to give a lacey look. A couple of glittered flowers and swirls and I was done.


With this I will be participating in the Itsy Bitsy "All That Glitters' Challenge. Hope you like it. And remember
Live More,
Laugh Often,
Love Much.

Indrani

Tuesday 18 June 2013

Colours Galore...

I normally am not a fan of a lot of colours. I generally stick to a specific colour scheme while working on a project. Too many colours at the same time confuse me. That doesnt mean too many colours together can't be great. Its just that it is intimidating. But recently inspired by the Catchy Challenges' Rainbow Colors Without a Rainbow, I came up with these two cards.

With the first one I created a background with beehive quillling. Atop that I sketched a lady with her tresses covering most of her face. She kind of looks beautiful to me. This is kind of a card I would love to gift to someone really pretty.


In the second card I created the background using Itsy Bitsy leaf die cuts. I searched my stash for coloured papers to match the rainbow VIBGYOR. I couldnt find anything in either indigo or violet. So I painted white papers accordingly and got the colours. I guess you can make out the coloured leaves from the rest!!! Atop the background, I quilled some simple white flowers & swirls and finished with some tiny punched flowers.


Hope you enjoyed my work with rainbow colours.
With these cards, I am participating in the Catchy Challenge for the month

Friday 7 June 2013

Quilled Wedding Card

Weddings in our country are lavish and full of vibrant colours. The exuberance of a wedding starts off right from the beginning, that is, with the invitations. Yes...the wedding card. I have seen some excellent ones in my life and hence was wondering how a quilled elegant wedding card might look like.

Thinking of it, here's something I attempted to craft - a paper quilled wedding card with an Indian touch.


I had to follow an elaborate process for the pink flowers. I painted a blank white sheet of paper with Fabricia pearl acrylic color pink. To get the silvery effect I added some dash of the pearl white. Then I cut out pentagon shaped pieces from the paper and folder the petals from it. Then arranged some 10 to 12 petals to form each flower. To finish it, added some pearls to the centre.


To add some bling I used few stones along the swirls. I resisted using more as I did not want the stones to be the focus of the work. 

All in all, I found it pretty catchy.

Do put in your thoughts on it.

Indrani


Sunday 2 June 2013

Laced Up

An old piece of lace I suddenly chanced upon was put to good use the other day. It found place in one of my works and a new card was created. I quilled some flowers and leaves in combination with the hues of the lace and this is what I came up with.


The small blue flowers were made by overlapping equal sized quilling strips and placing them in a circular fashion. The leaves too were made using the same method but are not of equal sized strips and were not arranged in a circle. I got the idea for these flowers and leaves from a daisy tutorial at Daydreams.


Ì advertently did not get too elaborate with the quilling part as the lace did that job for me. But what if the lace itself could be quilled? Maybe that's a project I should try sometime soon. Will get back to you all if i am successful.

Till then, happy quilling!

Ìndrani